1. Introduction
This script is supposed to give an overview about the concept of a library and a framework and distinguish one from another. We’re going to look at JUnit as an example of a test framework and Spring as an example of a general purpose application framework.
2. JUnit — a test framework
JUnit is a Java based test framework that — contrary to what its name implies — can be used to write both unit tests and integration tests. Until version 3, it used an inheritance based approach for its user-facing API. That has unanimously been considered too invasive so that the current framework generation relies on annotations.
2.1. Unit- VS. Integration tests
Software can be tested on multiple levels of granularity: individual components can be tested in isolation, in the context of collaborating components. The entire system can be tested as a whole.
The most fundamental approaches to testing are called unit tests. They rely on the component to be testable with a minimal amount of context available. It’s usually desirable to use a class on its own, potentially replacing required collaborators with test mocks or stubs. To make sure the effort for that is manageable, this requires the class under test to be used in an isolated way.
The four primary reasons developers write tests:
Prevent regressions
Improve design
Enable later refactoring
Document behavior
Thus writing unit tests for a component usually drives the design of that class to become more simple. The approach of writing test cases to drive the design of code is called Test Driven Design/Development (TDD[1])
3. A Java web application — Quick start
3.1. Objectives
-
Learn how to create, setup and run a Java based web project
-
Learn how to handle a web request
-
Learn how to efficiently work with web related code
3.2. Create a new project
-
Start STS.
-
Create a new project (or ⌘+N).
-
Select "Spring Starter Project".
-
Keep settings (details on that below).
-
Select "Web" in the Dependencies matrix.
-
Select Finish.
-
Browse to http://start.spring.io.
-
Keep settings (details on them below).
-
Select "Web" in the Dependencies matrix.
-
Select Generate project.
-
Open up your IDE.
-
In Eclipse select .
-
Select "Existing Maven Projects".
The result should be a Java project created in the IDE looking something like this:

What do we have here?
-
Application.javainsrc/main/java- The main (startable) application class. -
static/templatesfolders insrc/main/resources- Folders for static resources and view templates. -
application.properties- Configuration file. -
ApplicationTests.java- Integration test to test the application. -
pom.xml- The POM (Project Object Model). A Maven configuration file to control project setup, build and dependencies.
3.3. Add minimal functionality and run this thing
-
Create a new class, e.g. in the
demopackage: Selectsrc/main/java, press ⌥+⌘+N, typeClassor select to bring up the new class wizard. Enterdemofor the package name,WelcomeControlleras type name. Edit the created class to look like this:Example 1. A simple Spring MVC controller@RestController (1) class WelcomeController { @RequestMapping("/welcome") (2) String welcome() { return "Welcome"; (3) } }1 Causes the class to be found by the Spring container and turned into a Spring bean. This is not directly caused by @RestControllerbut the annotation being meta-annotated with@Controllerwhich is in turn annotated with@Component. See more on that in Fundamental building blocks of a Spring Boot application.2 Maps /welcometo the execution of the annotated method. All HTTP request to that URI will cause the method to be invoked.3 The result to be written to the response. Using @RestControllercauses theStringreturned to be considered the response payload.
|
When pasting this code into your IDE it might already import the right types for you. In case it doesn’t and you see red underlines e.g. under
|
-
Execute
Application.java(⌥+⌘+X,J or right click the class, ). -
Browse to http://localhost:8080/welcome, should give you
Welcome.
| Try using ⌘+Space while typing here and there. Eclipse will usually provide you quite useful suggestions for code completion. |
3.4. Make this a bit more dynamic
| If you run the application in debug mode, you can change method bodies on the fly without having to restart the app. We’re going to use that mode going forward. |
-
Change the method signature of the controller method to this:
welcome(@RequestParam(value = "name") Optional<String> name) -
Restart the application in debug mode (⇧+⌥+D,J or ).
-
Browse to
http://localhost:8080/welcome, output should be unchanged. -
Change the URI to
http://localhost:8080/welcome?name=Java, doesn’t have any effect yet. -
While the application is running, change the method body to:
return "Welcome ".concat(name.orElse("World")).concat("!"); -
Refresh the browser tab and the response should now adapt to changes of the
nameattribute.
4. Spring — An application framework
The Spring Framework [2] is an open-source, general purpose, Java-based application framework. Parts of it can be used as a library but at the very core of it it’s an inversion-of-control[3] container which allows you to write easy to test application components.
Beyond that it provides means to apply technical services (e.g. transactions and security) in a declarative and portable way, integrations with persistence and integration technologies as well as an MVC web framework.
As a developer you usually use Spring Framework through Spring Boot, which is an opinionated add-on to automatically configure and ease the set up of a Spring based application so that you can focus on your business code[4].
4.1. Inversion of Control
Inversion of Control (otherwise also referred to as Dependency Injection) is the software design technique that frees a component from the task to look up its collaborators and rather get those handed into the component – usually as constructor arguments. This inverts the control of this lookup from the component itself to its context (hence the name). The assembly of a component is externalized and usually taken care of by a generic framework but can — and almost always is — also be used manually e.g. in test cases.
This approach especially improves testability of components as the collaborators that would be used in a production environment can easily be replaced with test components.
4.2. Fundamental building blocks of a Spring Boot application
-
Application code — code you write, e.g. the
WelcomeControllerin the quick start example. -
Configuration — code to configure the application container. Declares references to infrastructure components (e.g. the database, security) and defines how application components are found:
Example 2. An example configuration class@SpringBootApplication class Application { public static void main(String... args) { SpringApplication.run(Application.class, args); } }
This is the primary application class (hence the name) and uses SpringApplication.run(…) in the main method to start a Spring ApplicationContext and inspect the given configuration, the Application class itself in this case.
The @SpringBootApplication is the annotation to enable very fundamental features of Spring boot. It actually acts like a combination of the following three annotations:
-
@Configuration— Declares the class to contain configuration. This will cause the container to detect methods annotated with@Beanfor you to provide custom components manually. -
@EnableAutoConfiguration— Enables Spring Boot’s auto-configuration features to activate features based on your classpath setup. -
@ComponentScan— Activates the detection of Spring components for the package of the annotated class.
Thus, using the single annotation, all of these features get activated at application startup.
4.3. Running a Spring Boot application
The application containing a main method, makes it very easy to start it from within the IDE as the class itself becomes executable. That’s very convenient during development. However, there are a couple of more ways we might want to execute the application: packaged into an executable, so that we can actually run it on a production server, and during integration test execution to verify its behavior.
4.3.1. Standalone
-
On the command line, run
mvn clean packageand run the JAR (Java application ARchive) usingjava -jar target/\*.jar. You can basically take the JAR created by the build and run that on any machine that has Java installed.
| Don’t be trapped by trying to use your IDE’s JAR export mechanism. It’s crucial for the application to work as a standalone JAR to be built using the the actual build mechanism, which applies the necessary plugins to make the JAR bootable. |
4.3.2. In integration tests
-
One of the most common ways of executing Test cases is with an open-source library called JUnit which has both Maven and Eclipse integration.
-
To bootstrap the application container in an integration test the test class has to look as follows:
Example 3. Bootstrapping the Spring container from an integration test@SpringBootTest @RunWith(SpringRunner.class) class ApplicationTests { … } -
@SpringBootTestexpresses Boot to be used during tests. The main configuration class will be auto-detected looking for a class with an@SpringBootApplicationin the current package and all above. -
@RunWith(…)tells JUnit to give Spring Framework the control over the test execution.
4.4. Application components
Application components are usually identified by an annotation that is either @Component or an annotation which is annotated with @Component in turn (e.g. @Service, @Repository, @Controller).
The component classes are discovered at bootstrap time and a single instance is created.
+ .A simple application component
@Component
class MyApplicationComponent {}
If a component needs other components to work with (e.g. the web controller needs access to the component implementing data access), the component required can be injected into the depending component by declaring a constructor taking a dependency of the necessary type.
@Component
class MyDependingComponent {

  private final MyApplicationComponent dependency;

  public MyDependingComponent(MyApplicationComponent dependency) {
    this.dependency = dependency;
  }
}
If a component depended on cannot be found in the container, an exception is thrown:
Caused by: org.springframework.beans.factory.NoSuchBeanDefinitionException: No qualifying bean of type [demo.MyApplicationComponent] found for dependency: expected at least 1 bean which qualifies as autowire candidate for this dependency. Dependency annotations: {}
  at o.s.b.f.s.DefaultListableBeanFactory.raiseNoSuchBeanDefinitionException(…:1118)
  at o.s.b.f.s.DefaultListableBeanFactory.doResolveDependency(…:967)
  at o.s.b.f.s.DefaultListableBeanFactory.resolveDependency(…:862)
  at o.s.b.f.s.ConstructorResolver.resolveAutowiredArgument(…:811)
  at o.s.b.f.s.ConstructorResolver.createArgumentArray(…:739)
  ... 42 common frames omitted
|
When using STS, classes that are Spring components carry a little S-overlay on the icon: 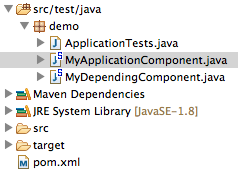
|
5. Sample class design
Appendix
Appendix A: License
